INTRODUCTION
This is the next version of the previous post : https://loookup.tistory.com/11
[Deep Learning] Check Wrong Predictions and Draw number with OpenCV and Predict it by MNIST Data
What is ' MNIST ' ? It's a dataset of handwritten, but also makes a lot of newbies frustrated. https://en.wikipedia.org/wiki/MNIST_database MNIST database - Wikipedia From Wikipedia, the free encyclopedia Database of handwritten digits Sample images from M
loookup.tistory.com
So, I'll skip introducing the reused functions.
Let's Check the Result and Code.
RESULT
CODE
import cv2
import numpy as np
import tensorflow as tf
import os
import matplotlib.pyplot as plt
import random
import copy
import math
os.environ['TF_CPP_MIN_LOG_LEVEL'] = '3'

# Global Variables
mouse_mode = False
pt = (0, 0)
color = (255, 255, 255)
thickness = 9
image = np.full((280, 280, 3), 0, np.uint8)
Test = np.full((280, 280, 3), 0, np.uint8)
Predict_Window = np.full((280, 500, 3), 255, np.uint8)
prediction = None

# MNIST Data Set import
mnist = tf.keras.datasets.mnist
(train_data, train_label), (test_data, test_label) = mnist.load_data()

# Normalize
train_data, test_data = train_data/255.0, test_data/255.0

# Flatten
train_data = train_data.reshape(60000, 784).astype('float32')
test_data = test_data.reshape(10000, 784).astype('float32')


# Model
model = tf.keras.models.Sequential([
    tf.keras.layers.Dense(512, activation='relu'),
    tf.keras.layers.Dense(10, activation='softmax')
])

# Model Compile
model.compile(optimizer='adam',
              loss='sparse_categorical_crossentropy',
              metrics=['accuracy'])

callbacks = [tf.keras.callbacks.TensorBoard('./logs_keras')]

model.fit(train_data, train_label, epochs=10, verbose=1, callbacks=callbacks)

train_result = model.evaluate(test_data, test_label)

print('loss :', train_result[0])
print('Acc  :', train_result[1])
print("----Model Construction Complete----")


def onMouse(event, x, y, flags, param):

    global pt, mouse_mode, color, thickness, image, Test, prediction, Predict_Window

    if event == cv2.EVENT_LBUTTONDOWN:

        pt = (x, y)

        mouse_mode = True

    elif event == cv2.EVENT_MOUSEMOVE:

        if mouse_mode == True:

            cv2.line(image, pt, (x, y), color, thickness)

            pt = (x, y)

    elif event == cv2.EVENT_LBUTTONUP:

        mouse_mode = False

        cv2.line(image, pt, (x, y), color, thickness)

    elif event == cv2.EVENT_RBUTTONDOWN:

        image, prediction = Find_and_Sort(image)

        Predict_Window = np.full((280, 500, 3), 255, np.uint8)

        result = 0

        for i in range(0, len(prediction)):

            sig = 1

            for sq in range(0, i):

                sig = sig * 10

            result += sig * prediction[len(prediction) - i - 1]

        cv2.putText(Predict_Window, 'Predict : ' + str(result), (50, 100), cv2.FONT_HERSHEY_SIMPLEX, 2, (0, 0, 0), 2)

        cv2.imshow("Predict", Predict_Window)

def Find_and_Sort(image):

    gray = cv2.cvtColor(image, cv2.COLOR_BGR2GRAY)

    th_img = cv2.threshold(gray, 100, 255, cv2.THRESH_BINARY)[1]

    # For Eliminate Noise
    # kernel = np.ones((5, 17), np.uint8)
    # morph = cv2.morphologyEx(th_img, cv2.MORPH_CLOSE, kernel, iterations=1)

    contours = cv2.findContours(th_img, cv2.RETR_EXTERNAL, cv2.CHAIN_APPROX_SIMPLE)

    rects = [cv2.minAreaRect(c) for c in contours[1]]

    w_list = []

    for center, size, angle in rects:

        w, h = center

        w_list.append(int(w))

    for idx in range(len(w_list)-1):

        criterion = np.argmin(w_list[idx:len(w_list):1])

        criterion = criterion + idx

        if idx != criterion:

            Duplicated_list = copy.deepcopy(w_list)

            w_list[idx] = Duplicated_list[criterion]

            w_list[criterion] = Duplicated_list[idx]


    candidates = [(tuple(map(int, center)), tuple(map(int, size)), angle) for center, size, angle in rects]

    dup_candidates = copy.deepcopy(candidates)

    for idx in range(len(w_list)):

        if candidates[idx][0][0] != w_list[idx]:

            for seq in range(len(w_list)):

                if dup_candidates[seq][0][0] == w_list[idx]:

                    candidates[idx] = dup_candidates[seq]

                    break

                else:
                    continue

    image , prediction_list = Model_Fit(image, candidates)

    cv2.imshow("PaintCV", image)

    return image, prediction_list


def Model_Fit(image, candidates):

    idx = 0

    prediction_list = []

    for candidate in candidates:

        crop = rotate_number(image, candidate)

        crop = fill(crop)

        Test = cv2.resize(crop, (28, 28), interpolation=cv2.INTER_LINEAR)

        Test = cv2.cvtColor(Test, cv2.COLOR_BGR2GRAY)

        Test = Test / 255.0

        Test = Test.reshape(1, 784).astype('float64')

        predict_result = model.predict(Test)

        prediction = np.argmax(predict_result, axis=1)

        prediction_list.append(prediction[0])

        cv2.imshow(str(idx + 1) + "th : result = " + str(prediction[0]), crop)

        pts = np.int32(cv2.boxPoints(candidate))

        cv2.polylines(image, [pts], True, (0, 255, 255), 2)

        idx += 1

    return image, prediction_list


def fill(image):

    h, w = image.shape[:2]

    h, w = int(h), int(w)

    if w % 2 == 1:
        w += 1
    if h % 2 == 1:
        h += 1

    fill = np.full((h + 20, h + 20, 3), 0, np.uint8)

    for y in range(-int(h/2), int(h/2)-1):

        for x in range(-int(w/2), int(w/2)-1):

            if x + int(h/2) + 10 < h + 20 and y + int(h/2) + 10 < h + 20 and x + int(w/2) < w and y + int(h/2) < h:

                try :

                    fill[y + int(h/2) + 10, x + int(h/2) + 10] = image[y + int(h/2), x + int(w/2)]

                except Exception as ex:

                    print(h, w, x + int(h/2) + 10, y + int(h/2) + 10, x + int(w/2), y + int(h/2))
                    print(ex)
            else:

                continue

    return fill


def rotate_number(image, rect):

    center, (w, h), angle = rect

    if w > h :
        w, h = h, w
        angle += 90

    size = image.shape[1::-1]

    rot_mat = cv2.getRotationMatrix2D(center, angle, 1)

    rot_img = cv2.warpAffine(image, rot_mat, size, cv2.INTER_CUBIC)

    crop_img = cv2.getRectSubPix(rot_img, (w, h), center)

    crop_img = cv2.cvtColor(crop_img, cv2.COLOR_BGR2GRAY)

    return crop_img


cv2.imshow("PaintCV", image)

cv2.putText(Predict_Window, 'Predict : ', (50, 100), cv2.FONT_HERSHEY_SIMPLEX, 2, (0, 0, 0), 2)

cv2.imshow("Predict", Predict_Window)

cv2.setMouseCallback("PaintCV", onMouse)

while True:

    cv2.imshow("PaintCV", image)

    if cv2.waitKey(1) == 27:

        cv2.destroyAllWindows()

        print("----End Handwriting Recognition with Multi-Digits----")

        break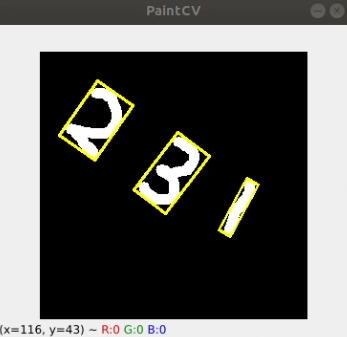
SOFTWARE SPECIFICATION
| OS | Ubuntu 18.04 LTS |
| Python | 3. 9. 16 |
| OpenCV | 3. 4. 11 |
| Tensorflow | 2. 7. 0 |
CODE EXPLAIN
Tensorboard Usage
callbacks = [tf.keras.callbacks.TensorBoard('./logs_keras')]

model.fit(train_data, train_label, epochs=10, verbose=1, callbacks=callbacks)
https://cloud.google.com/tpu/docs/cloud-tpu-tools
Cloud TPU 도구로 모델 프로파일링 | Google Cloud
의견 보내기 컬렉션을 사용해 정리하기 내 환경설정을 기준으로 콘텐츠를 저장하고 분류하세요. 중요: TPU 아키텍처에는 TPU VM과 TPU 노드 등 두 가지가 있습니다. 모델 성능 프로파일링은 두 아키
cloud.google.com
It is important to monitor the learning process. Tensorboard helps you to monitor easier.

First, command like Fig. 2., then copy the link ' http://localhost:yours/ ' and enter it.
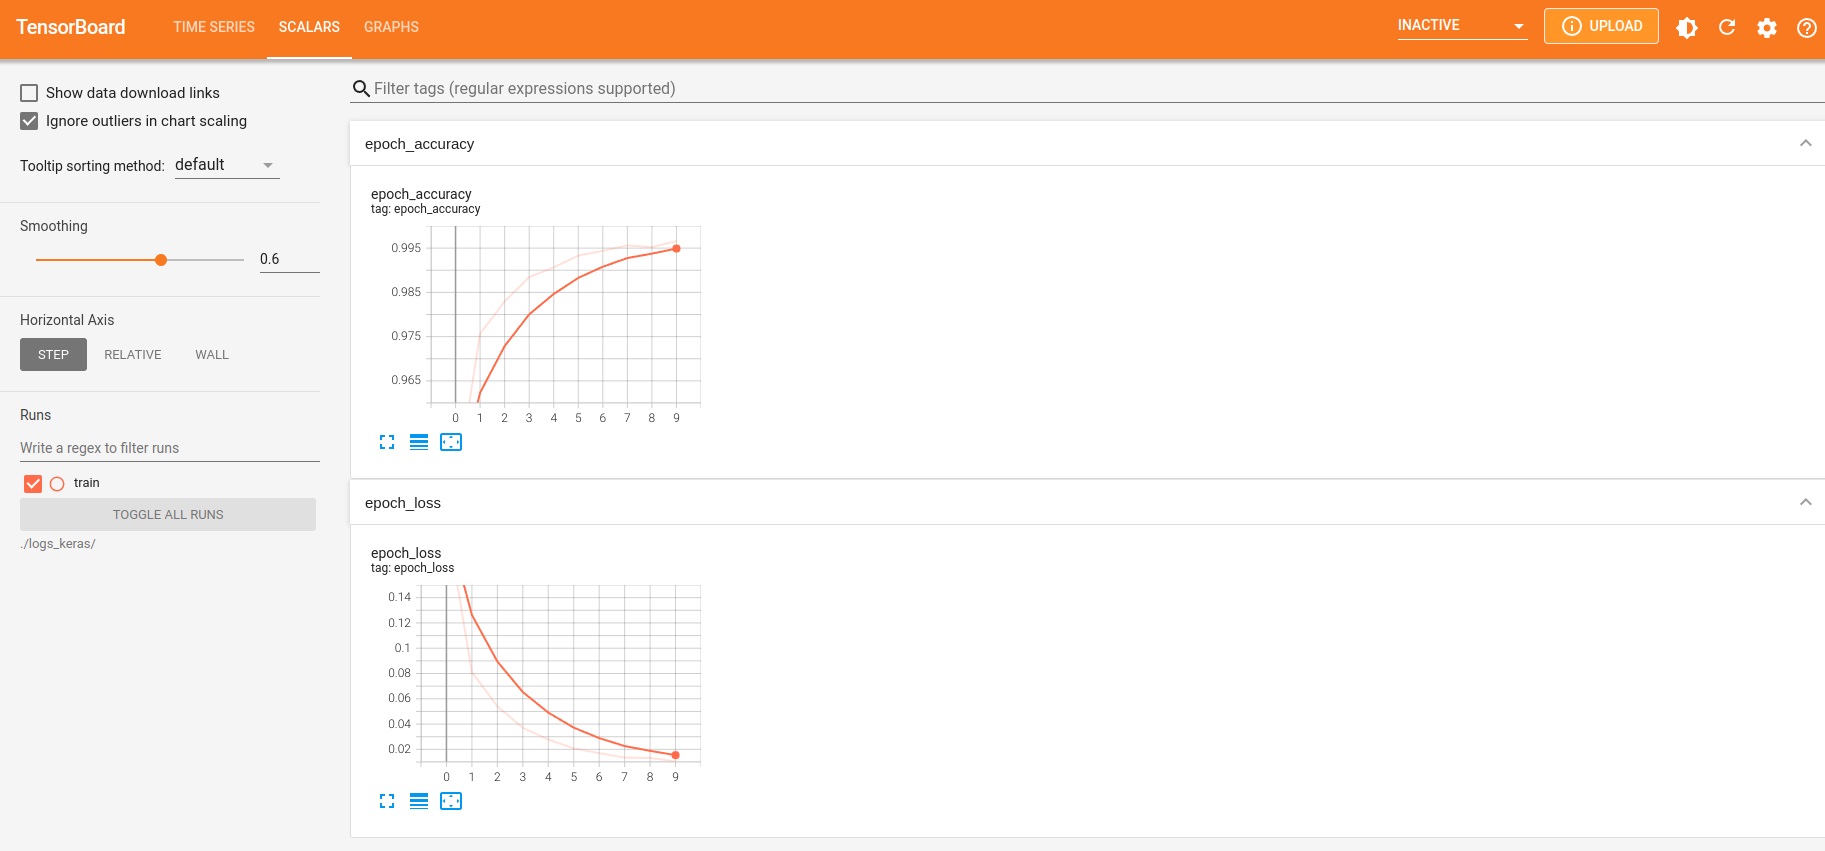
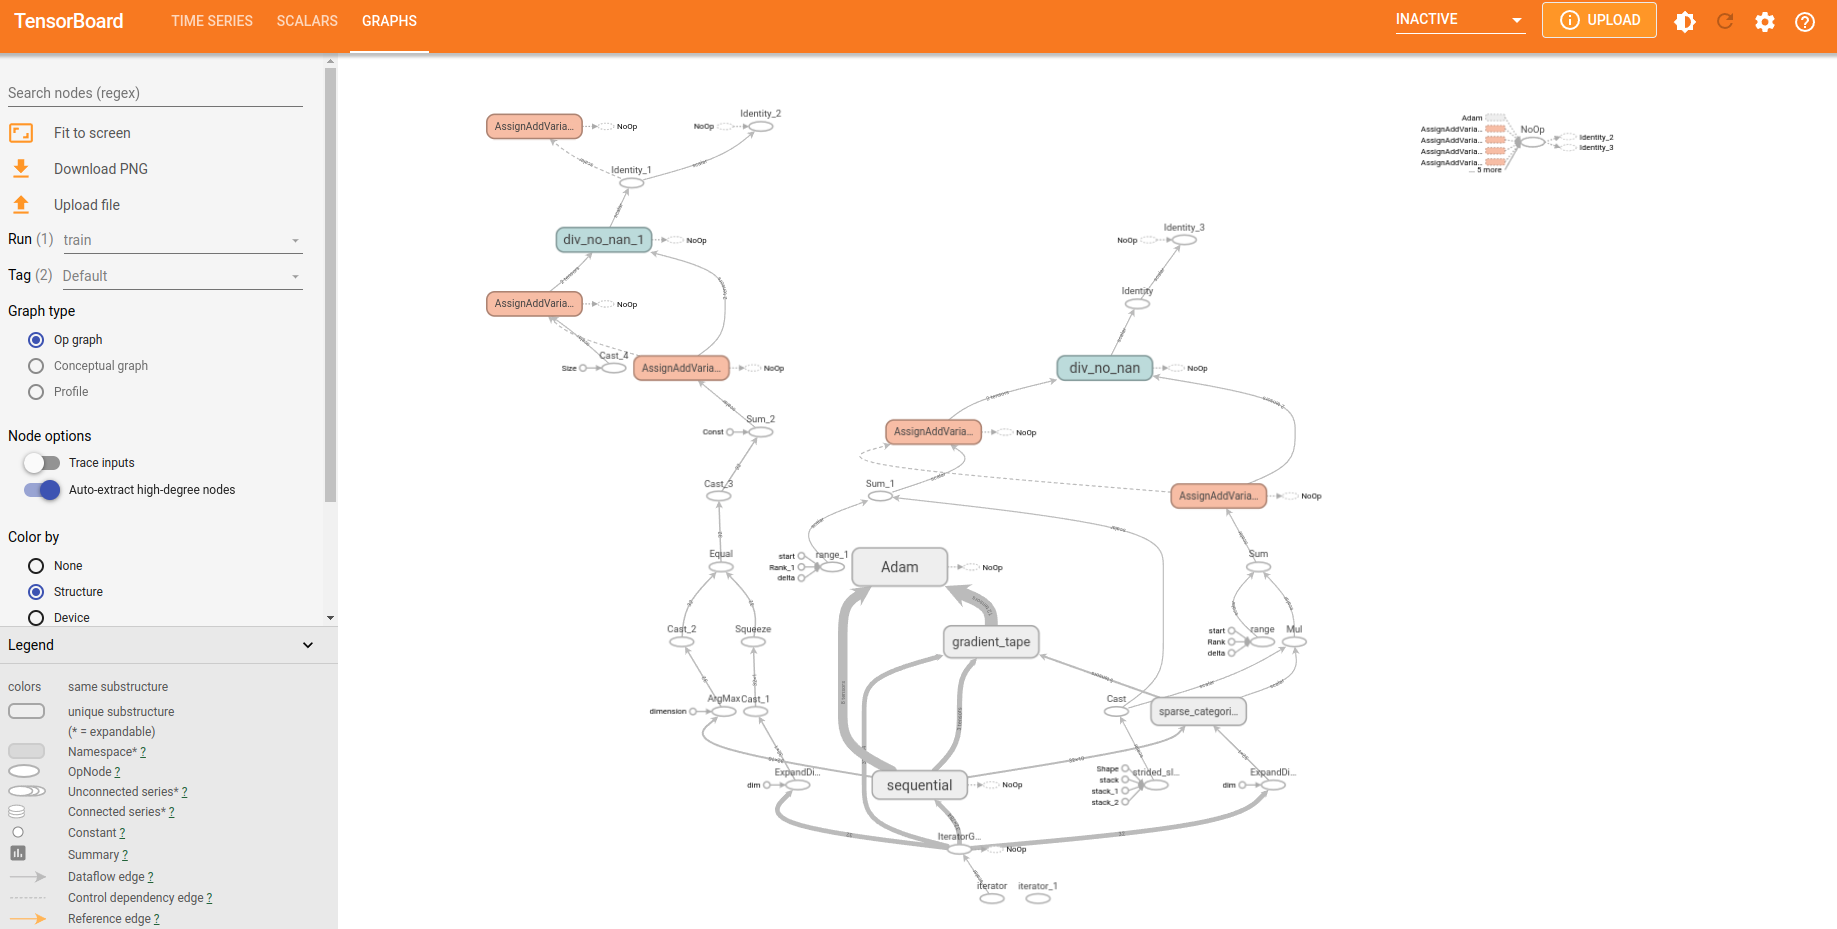
You can also get the DAC, Directed Acyclic Graph of Tensorflow.
Find and Sort Function
def Find_and_Sort(image):

    gray = cv2.cvtColor(image, cv2.COLOR_BGR2GRAY)

    th_img = cv2.threshold(gray, 100, 255, cv2.THRESH_BINARY)[1]

    # For Eliminate Noise
    # kernel = np.ones((5, 17), np.uint8)
    # morph = cv2.morphologyEx(th_img, cv2.MORPH_CLOSE, kernel, iterations=1)

    contours = cv2.findContours(th_img, cv2.RETR_EXTERNAL, cv2.CHAIN_APPROX_SIMPLE)

    rects = [cv2.minAreaRect(c) for c in contours[1]]
First, Let's look ' Find_and_Sort ' function.
If you puts painted Image into this function, it'll initially find numbers' contour with ' cv2.findContours ' and make Rectangles with minimum area by ' cv2.minAreaRect ', inner function of ' OpenCV '.
And if you meets error like below :
error: (-215) total >= 0 && (depth == CV_32F || depth == CV_32S) in function convexHullCheck ' rects = [ cv2.minAreaRect(c) for c in contours[1] ] ' not [0]. ( In OpenCV 3.11.45 Version )
Sort by Width
w_list = []

    for center, size, angle in rects:

        w, h = center

        w_list.append(int(w))

    for idx in range(len(w_list)-1):

        criterion = np.argmin(w_list[idx:len(w_list):1])

        criterion = criterion + idx

        if idx != criterion:

            Duplicated_list = copy.deepcopy(w_list)

            w_list[idx] = Duplicated_list[criterion]

            w_list[criterion] = Duplicated_list[idx]
And next code is for Sorting. In my opinion, if you use deep learning framework like Tensorflow or Pytorch, all you have to do is ' preprocessing '. Because trainning and predicting is framework's business, so you just make data in proper state and fit with model. But It's not easy, period.
So, my idea of sorting is detecting numbers with proper direction left -> right, like we read. But if you unveil above outputs, numbers are detected with BOTTOM -> TOP direction.
Therefore, make width_list[] and sort them according to size, minimum to maximum.
It will be used to compare with origin data.
Arrange Rectangles
candidates = [(tuple(map(int, center)), tuple(map(int, size)), angle) for center, size, angle in rects]

    dup_candidates = copy.deepcopy(candidates)

    for idx in range(len(w_list)):

        if candidates[idx][0][0] != w_list[idx]:

            for seq in range(len(w_list)):

                if dup_candidates[seq][0][0] == w_list[idx]:

                    candidates[idx] = dup_candidates[seq]

                    break

                else:
                    continue
And make candidates (numbers) and compare with the width_list's sequence.
Then. we'll get a proper sequential list.
Rotates Number
def rotate_number(image, rect):

    center, (w, h), angle = rect

    if w > h :
        w, h = h, w
        angle += 90

    size = image.shape[1::-1]

    rot_mat = cv2.getRotationMatrix2D(center, angle, 1)

    rot_img = cv2.warpAffine(image, rot_mat, size, cv2.INTER_CUBIC)

    crop_img = cv2.getRectSubPix(rot_img, (w, h), center)

    crop_img = cv2.cvtColor(crop_img, cv2.COLOR_BGR2GRAY)

    return crop_img
This function will be used for rotating numbers into not inclined, vertical position.
' rect ' variation has center, width, height, angle of each rectangles, so get the rotation_matrix by ' cv2.getRotationMatrix2D ', and rotates it with ' cv2.warpAffine ' function.
Fill the blanks
def fill(image):

    h, w = image.shape[:2]

    h, w = int(h), int(w)

    if w % 2 == 1:
        w += 1
    if h % 2 == 1:
        h += 1

    fill = np.full((h + 20, h + 20, 3), 0, np.uint8)

    for y in range(-int(h/2), int(h/2)-1):

        for x in range(-int(w/2), int(w/2)-1):

            if x + int(h/2) + 10 < h + 20 and y + int(h/2) + 10 < h + 20 and x + int(w/2) < w and y + int(h/2) < h:

                try :

                    fill[y + int(h/2) + 10, x + int(h/2) + 10] = image[y + int(h/2), x + int(w/2)]

                except Exception as ex:

                    print(h, w, x + int(h/2) + 10, y + int(h/2) + 10, x + int(w/2), y + int(h/2))
                    print(ex)
            else:

                continue

    return fill
And if you get rotated Image, it's probably not a square image.
For example if the number is ' 1 ', it has 10 width and 100 height, so you should make it into the sqaure.
Make a square base Image with ' height + 20 ' length.
'+ 20 ' because, MNIST handwritten data are placed on the middle of the image and have blanks between number's contour and every edge.
Model Fit
def Model_Fit(image, candidates):

    idx = 0

    prediction_list = []

    for candidate in candidates:

        crop = rotate_number(image, candidate)

        crop = fill(crop)

        Test = cv2.resize(crop, (28, 28), interpolation=cv2.INTER_LINEAR)

        Test = cv2.cvtColor(Test, cv2.COLOR_BGR2GRAY)

        Test = Test / 255.0

        Test = Test.reshape(1, 784).astype('float64')

        predict_result = model.predict(Test)

        prediction = np.argmax(predict_result, axis=1)

        prediction_list.append(prediction[0])

        cv2.imshow(str(idx + 1) + "th : result = " + str(prediction[0]), crop)

        pts = np.int32(cv2.boxPoints(candidate))

        cv2.polylines(image, [pts], True, (0, 255, 255), 2)

        idx += 1

    return image, prediction_list
Next, give processed Images to our Model and take predictions. ' prediction_list ' is composed with highest-digit number place front and lowest-digit number end, so in fig. 1., prediction_list = [ 2, 3, 1 ].
Complete Number
elif event == cv2.EVENT_RBUTTONDOWN:

        image, prediction = Find_and_Sort(image)

        Predict_Window = np.full((280, 500, 3), 255, np.uint8)

        result = 0

        for i in range(0, len(prediction)):

            sig = 1

            for sq in range(0, i):

                sig = sig * 10

            result += sig * prediction[len(prediction) - i - 1]

        cv2.putText(Predict_Window, 'Predict : ' + str(result), (50, 100), cv2.FONT_HERSHEY_SIMPLEX, 2, (0, 0, 0), 2)

        cv2.imshow("Predict", Predict_Window)
So if you push right button down, Code calculates it's digit, outputs result and show.
ERROR
If you faced an error message like below, it can easily solve with two command
successful NUMA node read from SysFS had negative value (-1), but there must be at least one NUMA node, so returning NUMA node zero
Solution
$ cat /sys/bus/pci/devices/0000\:01\:00.0/numa_node>> -1
$ echo 0 | sudo tee -a /sys/bus/pci/devices/0000\:01\:00.0/numa_node
>> 0
Solved !
Thank you for watching !
'Computer Vision > Deep Learning' 카테고리의 다른 글
| [ChatGPT] Apply ' ChatGPT ' to my Code and make my own chatting software (0) | 2023.03.22 |
|---|---|
| [DNN] Check Wrong Predictions and Draw number with OpenCV and Predict (0) | 2023.03.13 |

댓글